Havasupai Falls Packing List: Camping and Lodge Stays
By now, you’ve secured permits to Havasupai Falls, read up on what to expect, and need to start planning what to pack. Whether you’re new to backpacking or not, this can be intimidating. You’ll be responsible for bringing everything you need to survive in the Grand Canyon for four days.
This blog has everything we packed, wished we’d packed, and learned about backpacking over the years so you can rest assured you’ll be well prepared.
If you’re new to backpacking, Havasupai Falls is a great trail for beginners. The trail is well-established and marked, and you’ll be near others throughout your hike and stay. Campground amenities, like the bathrooms and picnic tables, make this a more luxurious stay than other trails. However, you’ll need to know more than this blog covers — like insight on how to pack and adjust your bag and what to do if you’re feeling pain from wearing your backpack. This blog covers all that and more.
Already familiar with backpacking? Click the links below to skip to a section.
What to leave in your car at the trailhead
Disclosure: This post includes affiliate links with recommended lodging recommendations and hiking gear. We’ll receive a small portion of that sale if you click through and reserve lodging or purchase a product. You won’t be charged more, and we haven’t been paid by any of these retailers to share their information. These are all our genuine preferences.

Hiking gear
Backpacking backpacks
Zach has Gregory Baltoro 75L bag
Meghann has the Osprey Ariel 65L
The larger your bag, the more items you’ll want to bring, so resist the urge to pack your bag full!
We highly recommend trying on packs at REI. They’ll help you load them with weight, teach you how to adjust the bag, and find the appropriate size for your torso.
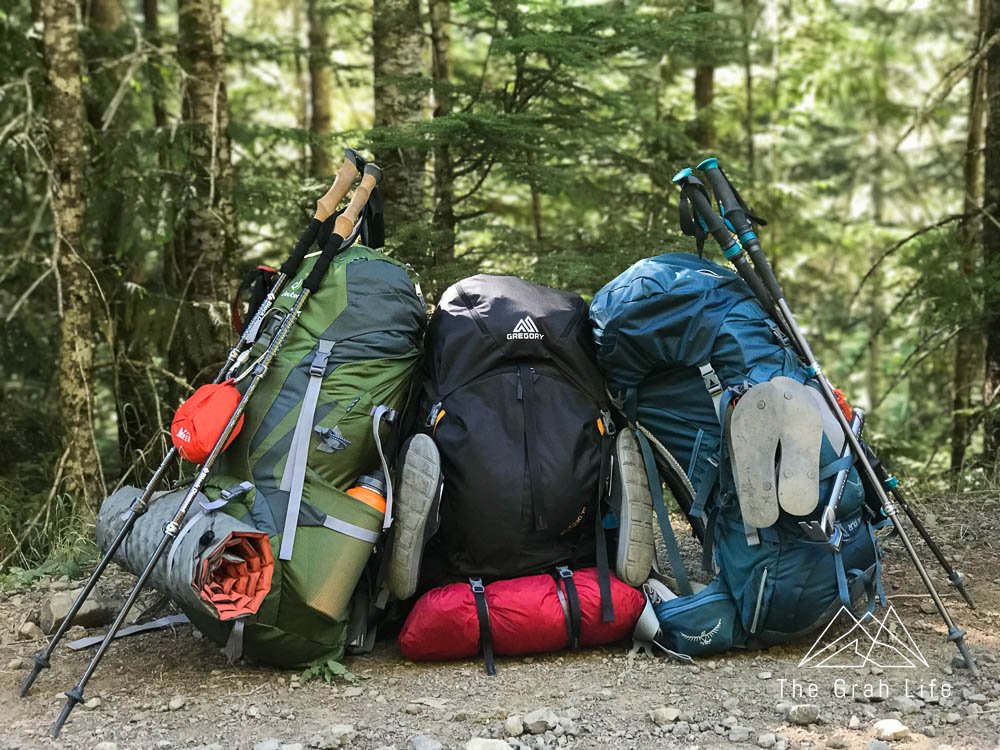
Zach’s Gregory pack in the middle and Meghann’s Osprey is on the right on a different backpacking trip
Rain covers for your backpack
Some packs, like Zach’s Gregory Baltoro bag, have this built-in, so make sure yours doesn’t before you make an unnecessary purchase.
A plastic poncho or garbage sack works in a pinch.
These help keep your balance and keep weight off your knees, which is especially helpful while backpacking, and hiking, downhill.
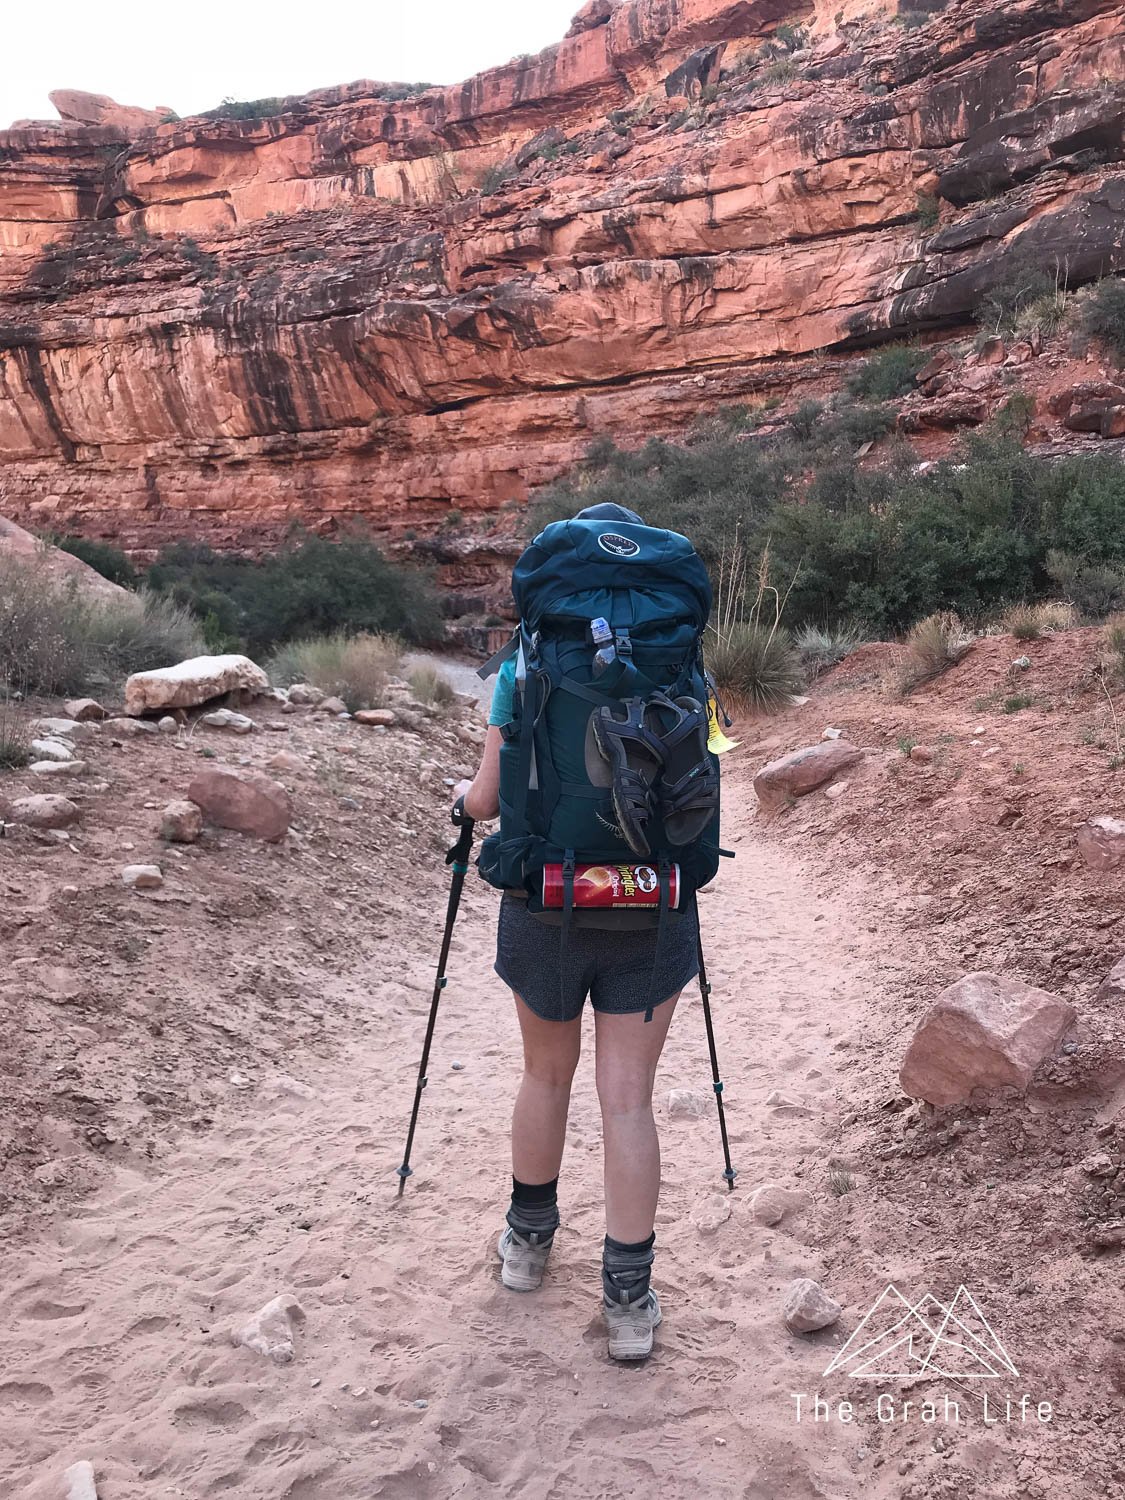
Meghann on the uphill hike out with a can of Pringles from the General Store strapped to her bag for snacks later
You’ll want to bring a bag with plenty of water, snacks, and the ten essentials with you on your day trips to visit the five waterfalls at Havasupai Falls. You can bring your backpacking bag, but it would be unnecessarily large for these day hikes.
Instead, take a packable day pack with you. Some backpacking bags, like the Gregory Baltoro, have these built in!
Use these to attach things to your pack – including sandals or other camp shoes!
Sleeping
Tent
We’ve got this two person MSR Hubba Hubba tent – you may be tempted to go for a three or four person tent, but every pound adds up when you’re carrying it for miles.
Backpacking tents are small, and there likely won’t be enough room inside for you and your backpack. Fit your backpack in the vestibule (the space between the tent and the rainfly) instead.
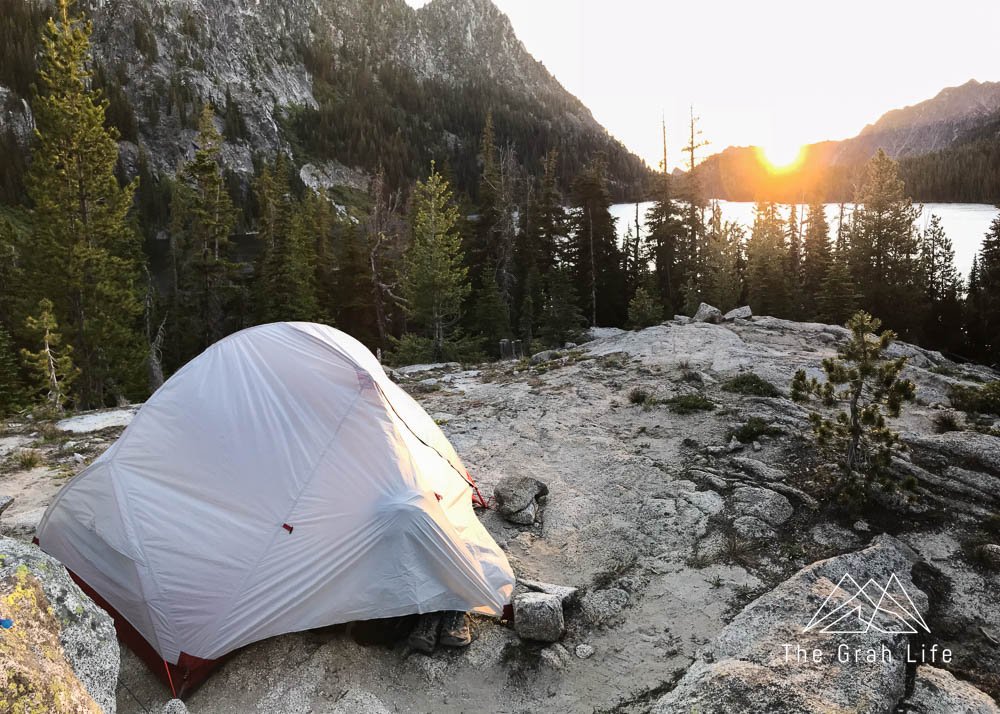
Our MSR Hubba Hubba tent on a Washington backpacking trip with gear in the vestibule
This protects the bottom of your tent, especially when you’re on granite or other hard surfaces. It’s a must for us!
Using Tyvek is a cheaper option for this.
You can find a rock to hammer in tent stakes, but we prefer using a lightweight hammer.
You’ll want to buy warm, packable sleeping bags
Pay attention to the size of bags before buying — if you’re taller, opt for a bag that comes in a long size.
If your bag doesn’t come with a stuff sack to transport it in while backpacking, you’ll need to buy one — trying to stuff it in your backpack without one is very difficult.
Sleeping bags aren’t unisex — women’s bags tend to have more room for hips, with more down filling in areas like the foot box where women generally feel colder than men.
Sleeping pad
These aren’t just to keep you comfortable while sleeping on the ground – they’ll help keep you warm, too.
The R-Value tells you how insulated a sleeping pad is. The scale ranges from 1.5 to 7. We recommend getting one with a rating between 3 and 5 so you’ll sleep comfortably between spring and fall in mountainous territories (the higher the number, the more insulated it is).
We love how comfortable blow-up and self-inflating sleeping pads are, but they weigh a bit more. Go with Klymit Luxe for colder temperatures or the Klymit lightweight for warmer nights.
For harder trips, we bring lighter (and less comfortable) Therm-a-Rest Z Lite sleeping pads. They’re great to pull out of your tent to use as a seat at camp as well.
Pillows
We mentioned that we have yet to find a backpacking pillow we love online, and everyone recommended the Nemo Fillo. We love that it has a machine washable cover, and uses a combination of foam and air to create a comfy pillow that doesn’t go flat. You can also use a compression bag filled with the trip’s clothing as a pillow.
Hammock
The campground at Havasupai Falls has enough trees that it’s possible to bring a hammock sleep system instead of a tent. To sleep in a hammock you’ll need a hammock, of course, but also need straps to hang it up with, a bug net, rain fly, and under quilt. Find a bundled hammock, straps, bug net, and rain fly here and an underquilt here.
Although both of us enjoy sleeping in hammocks overnight, it’s not for everyone, and there are pros and cons to consider.
Pros
Packing two hammock sleep systems is lighter than packing our tent.
More comfortable than sleeping on the ground.
More airflow potential than tents.
Easier to pack in your backpack than a tent.
Cons
They provide little to no privacy for changing.
They have less space to keep gear out of the rain or away from critters.
They can be hard to get in and out of.
Tents can sleep more people.
Footwear
Hiking boots
Again, we recommend going to REI to get fitted for boots. Their employees are well-versed in the sizing trends of each brand and can help you choose boots according to your needs.
Check out this article if you can’t visit an REI in person.
Good boots should not need to be “worn in”, although we do advise trying out new boots before backpacking with them.
All said, Meghann loves her Vasque boots and Zach loves his Lowa’s.
For blisters
If you’re getting blisters from your boots, try tying your laces differently. If that doesn’t help you either need a different pair of boots, or you can try sock liners, or using anti blister balm.
Wool hiking socks (men’s/women’s)
Meghann wears these year-round — they help keep gravel and sand out of your boots.

Water shoes or hiking sandals
Flip flops won’t cut it here. The creek bed is slippery and has sharp rocks and edges. You’ll need water shoes or sandals that have great grip, that you’ll be comfortable hiking in for miles.
When we backpacked to Havasupai in 2018, there wasn’t much information on what to pack online. We opted to bring Chacos hiking sandals (men’s/women’s). They were great for walking around the Supai Village, but our feet got cut up by sand and gravel on our hike to Beaver Falls. We’d recommend wearing neoprene socks with them to potentially prevent this.
Now that we backpacked through the world’s largest cave with tons of water crossings, we’d highly recommend wearing Salomon Speedcross boots (men’s/women’s). Avoid the version of this boot with Goretex to let water flow in and out of the boot. These boots worked extremely well for us in slippery, rocky conditions and we’re confident they would work well here too.
We’ve also seen others mention that they hiked to Beaver Falls in their hiking shoes, changing shoes at every water crossing. This is a sure way to keep your feet happy, but it would be very time consuming.

Zach in a sunshirt on a backpacking trip to Stehekin
Bottoms
You’ll want moisture-wicking pants (men’s/women’s) or shorts (men’s/women’s) depending on temperatures and the time of year you’ll be visiting. If you’ll be hiking to Beaver Falls, you’ll want shorts (many river crossings) regardless of the season.
These also double as a windbreaker.
These wool undergarments are odor-resistant and temperature-regulating.
Choose longer briefs to help prevent chafing.
This Smartwool bra is odor-resistant and temperature-regulating.
Choose to wear a bra with minimal/flat straps — bras with hefty straps dig into Meghann’s shoulders with the backpack on for long periods of time.
Swimsuits
The red rocks stain swimsuits and clothing. Black swimsuits don’t show the stains as much!

The campground and trail can be dusty. Hiking with a buff or bandana can help keep you from breathing it in and keep you warm if you’re visiting during the colder months.
Pack your clothing in a compression bag to create a compact and packable brick.
Double its use by using it as a pillow.
Depending on how cold temperatures are, you may also need:
Base layer bottoms (men’s/women’s)
Base layer tops (men’s/women’s)

We wore base layer bottoms for the sunrise hike into Havasupai Falls in April
Camp kitchen
You’ll need to put all your food and smelly items (including wrappers and items like toothpaste) in a rat sack to keep the squirrels from stealing your food.
We love that this kit comes with storage bags and a utility cord to hang your bag with.
Camp stove
Having a Jetboil makes heating water so easy.
It has an igniter built in and comes with a pot to heat water, a lid/strainer, and a measuring cup/bowl.
There is a heat indicator on the side that begins to turn orange when it starts to get hot. The more orange you see, the hotter it is, making it easy to heat water to an appropriate temperature for hot cocoa, coffee, or a meal.
Add this French press to your kit if you’re a coffee drinker!
The MSR Pocket Rocket Stove Kit offers another versatile cooking solution.
This one does not have a built-in igniter, so you’ll need to bring a lighter with you.
We leave this out on hard trips (we aren’t coffee drinkers) but it’s a necessity for some.
Utensils
We love these long sporks — they’re perfect for reaching the bottom of rehydrated meal bags.
Make sure to always wash dishes 200 feet from water sources.
Bonus, you can use this as body wash and shampoo as well.
These are handy for drying dishes.
Sponge or dish scrubber
Food
Hiking snacks
You’ll want to eat snacks every one to two hours throughout the hike to Havasupai Falls. This gives your body a steady injection of fuel, rather than waiting for larger meals throughout your day.
We love to snack on various protiens, such as trail mix, jerky, beef sticks, hard cheese, salami, as well as chicken or tuna packets with crackers. Luna Bars (their lemon blueberry bar is THE BEST), Lara Bar, and Clif Bars also make good eats, as well as dried fruits, and salty items like these pizza parmesan crisps.
Replacing electrolytes and salt
You’ll be sweating out salt and using lots of electrolytes during your hikes at Havasupai Falls. To prevent hypernatremia, you’ll need to take salt pills or Nuun (caffeinated/uncaffeinated). Drinking water and eating salty snacks won’t be enough on their own.
We also love to keep a tube of Nuun in our car to use after hiking. We use the caffeinated ones to help us stay awake if we have a long drive back to our lodging. If you’re still feeling dehydrated the following day, take more.
You can also take salt pills (caffeinated/uncaffeinated), but we think Nuun is more convenient.
Meals
Eating prepackaged dehydrated meals is the best way to keep your pack light and get the nutrition you need. They’re easy to make, only requiring boiling water to cook, and keep your dishes light.
We love the meals by Peak Refuel. They’re by far the tastiest dehydrated meals we’ve ever had, and we love that their allergens (like gluten) are well marked. The Chicken Coconut Curry is our favorite!
Check out this blog for more tips on what to each and how much food to bring.
Havasupai Cafe
It’s also possible to eat at the Havasupai Cafe in Supai Village. It’s two miles from the campground, near the lodge and general store. Store hours varied while we were there, so consider eating meals here spontaneously, rather than depending on them.
Hydration
You’ll need to carry a minimum of 3.5 liters of water per person for your hike in and out of Havasupai Falls because there aren’t any water sources to along the route. The best way to do this is with a water bladder. A water bladder allows you to drink any time you like during your hike without having to stop hiking and search for a water bottle.
You’ll find water spigots in Supai Village and at Fern Springs about 1/4 of a mile into the campground. The Tribe recommends you filter this water.
The Platypus Gravity Water Filter is our favorite water filter since it’s effortless.

Zach using the gravity filter
Hygiene supplies
Toilet paper (pack this out if it’s not going in a pit toilet), a pee cloth, or a pee funnel for the people who pee standing up (it’s a game changer).
Gallon Ziploc bags for garbage
Pee funnel
This is a game-changer for the women/trans/non-binary folk!! It allows you to go pee standing up. Since you only have to unzip and point the direction you want to let things flow, it’s much more private than pulling down your pants and squatting.
You can wash off in the river (shampoo and soap are not allowed anywhere in the campground) but wipes work wonders to help you feel cleaner, especially on your face.
This repellent by Plant Therapy has been just as effective as Deet at repelling mosquitoes for us.
We didn’t have a problem with bugs when we visited in April, but we’ve heard the bugs come out as soon as the trees start to bloom, and bug spray is a necessity.
Grab a lip balm that has sunscreen!
The desert heat irritates skin, causing it to crack. Use Aquaphor, which is like a heavy-duty lotion to heal skin and wounds.
prevents chaffing.
Travel size deodorant (men’s/women’s)
Travel-size toothpaste and toothbrush
Personal medications
Emergency supplies
Check out this video to learn how to use this
Map of the area you’ll be hiking in
When we got serious about backpacking, we invested in this personal locator beacon. It gives us peace of mind with the ability to set waypoints, text others when there is no cell service, and use the S.O.S button for emergencies.
There is a monthly subscription fee
Remember to bring backup batteries.
We carry a Sharpie with us in case of snake, tick, scorpion, or other bites.
In the event of a bite, circle the border of the swelling and write down the time to help emergency personnel assess the severity of your bite.
Band-aids and blister care
You’ll want to have a good stash of band-aids and blister care, especially if you plan on day hiking to Beaver Falls. Walking through the river, sand, and gravel is very tough on your feet. Pack more of these items than you’ll think you’ll need.
We like to put a band-aid over blisters, then Luekotape on top of the bandaid to keep it in place.
These are great to have in case your water filter breaks.

Luxury items
We think of camp chairs as luxury items because we can usually find rocks or logs to sit on at campsites; however we’ve talked with others who say they won’t backpack without them. You’ll also find picnic tables spread throughout the campground, but not at every site.
Therm-a-Rest Z Seats are a lighter option that gives you some cushion for sitting on rocks or logs.
Packable towel
We love this quick-drying towel from Nomadix. One towel is enough to dry both of us off, and we’re considering it a luxury (unless you’re visiting in the winter months) because we always dried in the sun after swimming at Havasupai Falls.
Hammock
Relaxing in a hammock is a great way to spend time in the campground. We love how light the Eno hammocks and straps are.
Although you’ll already have a headlamp with you, we love bringing along a small lantern when backpacking as well. This would be a must if you’re camping with limited daylight hours in the winter, but it’s a luxury during the summer months. It’s great for lighting up your cooking area and tent after dark.
Camera gear
Check out our blog on How to Photograph Havasupai Falls to read more on what to bring to capture the perfect waterfall shots! Drones are not allowed.
You can easily save phone battery by putting your phone on airplane mode as soon as you lose service, however, if you’re worried about battery life for any device, pick up this power bank. It charges 2.5 smartphones and is FAA carry-on compliant, making it easy to travel with.
No water toys
The Tribe does not allow pool toys, water guns, or floaties of any kind.
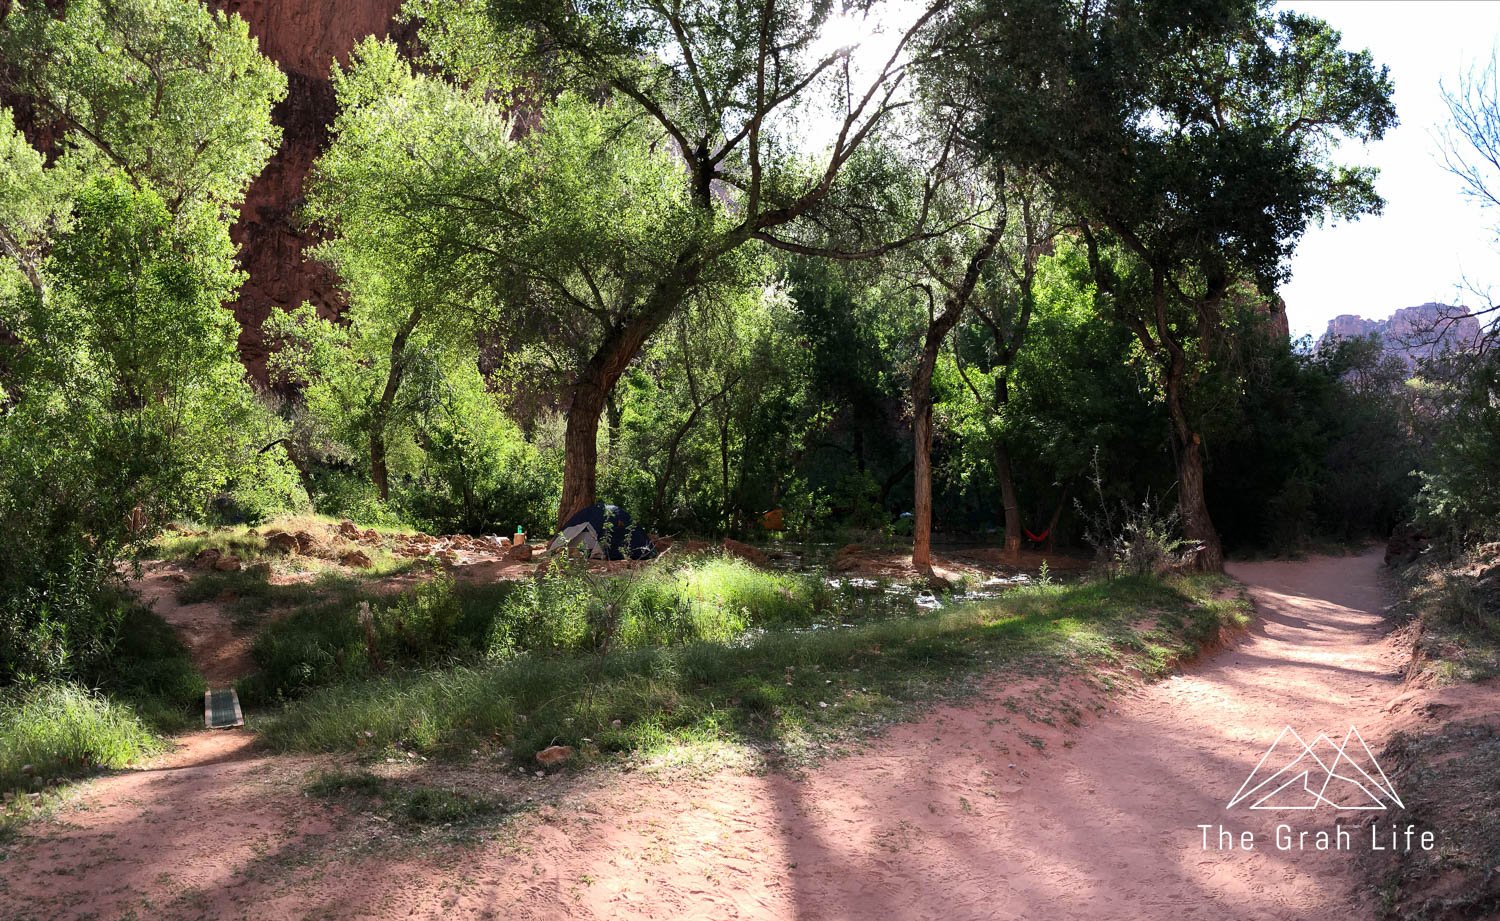
The campground
Lodge stays
Since the lodge provides shelter, bedding, towels, and soap, people with permits here won’t have to pack nearly as much as the campers.
Pack everything above except what is covered in the sleeping section, the rat sack, and a camp chair as the lodge has picnic tables.

Lodge rooms in 2018
What to leave in your car at the trailhead
Getting back to the trailhead feels like such a relief after finishing your 10+ mile hike out of Grand Canyon. However, keep in mind that the nearest restaurants are still a two-hour drive away. You’ll want to leave yourselves the following supplies to make getting back to town more comfortable:
Water
It’s going to be hot after sitting in your hot car for four days, but we happily drank ours, and it’s a smart thing to have waiting for you.
Snacks
Leave yourselves prepackaged snacks. You’ll have just hiked all day. You’ll be hungry!
Change of shoes
Leave yourself a change of shoes and socks. Getting out of your hiking boots will be the first thing on your agenda when you get back to the trailhead.
Change of clothes
Packing fewer items of clothing is the fastest way to cut pack weight. The least you could do for yourself is leave yourself a clean set of clothing (undergarments, too!) to change into upon returning.

View near the trailhead
Havasupai paperwork
The trip leader should have the following for check-in at the Grand Canyon Caverns:
Print out or screenshot of your reservation
Government-issued photo ID
The license plate number of the vehicle that will be at the trailhead
All group member should bring:
Government-issued photo ID
Wristbands/Havasupai permits
Copy of your health insurance card
Cash and credit card
How to travel with your gear
Havasupai Falls was the first backpacking trip we flew to. Renting gear wasn’t as popular or as affordable then, so we had to find a way to fly with our gear.
Checked bags
You’ll need a large luggage bag, duffel bag, or box to check – these large bags from Ikea work great for this. You’ll have too much to stash in your backpack to count as a carry-on, and checking your backpacking bag alone is too risky — there are too many components that could catch and rip your bag apart.
Put your backpacking backpacks in the larger bag, along with your tent, trekking poles, camp stove (without fuel), utensils, first aid kit, multi-tool, and other things that you aren’t allowed to carry on. Be mindful of the weight limits to avoid extra baggage fees. Remember that you’re not allowed to pack propane. You’ll have to buy that in person upon arrival.
Once you’ve arrived, the extra luggage bag can be stored in your rental car (out of sight in the trunk of your car), with the items you have for the return to the trailhead in it.
Ship gear ahead
Although this is an option, it takes more planning. You’ll need to find a location that can ship and hold packages for you, which may come at an extra cost (try FedEx or UPS). Make sure they’ll be open when you need to pick up your package, and ask when the best time to ship your package will be. You’ll want it to have enough time to arrive, but don’t want to send it too early.
Before boxing up your gear, stash it in a contractor bag (a heavy-duty plastic bag) to prevent anything from escaping if your box gets trashed. Be sure to pack an extra bag for the shipment back and keep your box for the return trip. Mailing propane is possible, but there are guidelines to follow. Consider purchasing it upon arrival instead.
Renting gear
Renting gear is a great alternative to traveling with backpacking gear or buying gear before you’re ready.
Las Vegas
Basecamp Outdoors in Las Vegas has everything you need for rent, as well as specific packages curated for Havasupai Falls.
REI
REI in Las Vegas (and other select locations) has backpacking rentals as well. They have the most extensive selection and it’s all a la carte, so you can create your ideal backpacking setup.
Flagstaff
If you’re flying into Phoenix, route yourself through Flagstaff to rent gear from Babbitt’s Backcountry Outfitters.
Want to know more about Havasupai Falls?


Search the blog for more adventures! Try searching for topics such as “mountains”, “road trip”, or “Mount Rainier”.