How to Photograph Havasupai Falls: Gear, Tips, and Advice
Visiting Havasupai Falls is an incredible opportunity to see, and photograph, some of the U.S.’s most distinct landscapes. When we visited in 2018, there was little information about visiting online, and nothing about photographing the five waterfalls there.
This blog is full of everything we wish we would have known before getting permits, visiting, and everything we’ve learned since. Why should you trust us? Meghann’s a professional photographer – check out her work here.
Know what you’re searching for? Click on the links below to jump to a section:
How to visit Havasupai Falls responsibly
Camping vs the Havasupai Lodge permits
The best time to photograph Havasupai Falls
Disclosure: This post includes affiliate links with recommended lodging recommendations and hiking gear. We’ll receive a small portion of that sale if you click through and reserve lodging or purchase a product. You won’t be charged more, and we haven’t been paid by any of these retailers to share their information. These are all our genuine preferences.

How to visit Havasupai Falls responsibly
Visiting Havasupai Falls is not an easy process. It requires a hike or helicopter ride in and a permit. When you’re there, you’ll need to be responsible by practicing the leave no trace principles and following the Havasupai Falls rules regarding photography, including the following:
No drones
No photographs of the mules, Supai village, or the Tribe members
There’s plenty of places to take photos from a high vantage point without a drone
Camping vs the Havasupai Lodge permits
Camping
There are two major differences between getting permits to camp or staying in the lodge for photography. If you choose to camp, you’ll be based next to Havasu Falls. This gives you the opportunity to photograph it at night. It’s the only waterfall you’ll be able to photograph at night because the Tribe does not allow night hiking.
Havasupai Lodge
The benefits of staying at the lodge are simple — you have lodging covered. You can trade the weight of a tent for camera gear, making packing your own gear much more doable. However, the lodge is two miles from Havasu Falls. Stay here and you will not be able to photograph the waterfalls at night.
Photography gear list
Camera backpacking bag
We love our 40L Anja bag from f-stop
We both find it comfortable to wear, although it’s slightly too large for Meghann’s 5’4 frame
We got the bright orange color, and it still looks like new after years of use
We have the large Internal Camera Unit (ICU) to organize gear inside the bag, but you can choose between small and extra-large ICU’s to hold your gear and mix and match between bags

Camera
You’ll want a camera, like a mirrorless or DSLR, where you can change the settings and take long exposures
We have the Canon R6 Mark II now, but all of these images were taken with our iphones or Canon EOS 5D Mark III
Consider the Nikon D5700 for a more budget-friendly option
Wide lens
You’ll want lenses anywhere between 14mm and 24mm to capture the waterfalls
We love our 24-70mm for its versatility while traveling
You’ll want a lightweight tripod
You’ll want your tripod to extend to hip height to keep your camera out of the water

You’ll need an ND filter to capture long exposures of the waterfalls in daylight
Think of them like sunglasses for your camera — they make your lens darker so you can take longer shots without overexposing your photos
Camera rain cover
The spray from the waterfalls will get your camera wet
We’ve tried rain cover products before and found them to be cumbersome. Instead, use a gallon Ziplock with a hole punched out for your lens
Lens wipes
Like your camera, your lens will get wet too
We used these Kimtech wipes to dry off our lens between shots
Batteries
Long exposures use battery quickly so you’ll want to bring two to three camera batteries
Only buy camera batteries from your camera manufacturer — off-brand batteries can malfunction or damage your camera
Memory cards
Buy memory cards from reputable brands as well — cheaper brands go corrupt much faster
We rely on cards from SanDisk
Switch out your memory cards by day (or more) to reduce the chances of files being lost if one card goes corrupt
Take a Go Pro for photos and videos of all the action without risking your DSLR
Check out this blog for more information on what to pack for the rest of the trip.

The best time to photograph Havasupai Falls
Havasupai Falls is beautiful year-round. Check out the seasonal differences here, but know that you can visit any time of year and capture incredible photos.
You’ll want to time your photographs when the waterfalls have the most even light — either completely shaded or in full sun. You’ll have shade in the mornings and evenings when the sun is behind canyon walls. The falls are usually in full sun in the early morning to mid-afternoon. Use the tools we mentioned below to find your ideal time to photograph each waterfall during your visit.
We’d suggest photographing Havasu Falls in the early morning when it would be least crowded and saving Mooney Falls for the late morning, or early evening. If you go down to Mooney Falls earlier in the day, plan to stay downstream of Mooney Falls for the day. The climb down to Mooney Falls only allows traffic one way, and once a line forms with climbers heading down, it’s difficult to reverse the flow of traffic. Read more on this here.
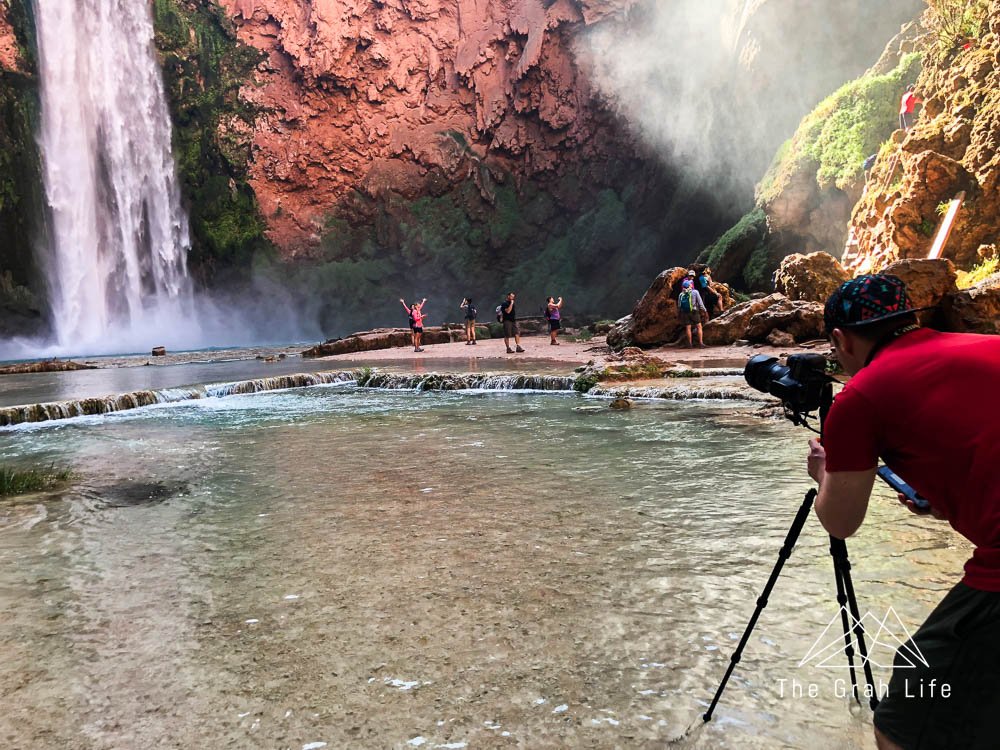
Late morning crowds at Mooney Falls

Photography planning tools
We got lucky with our shot of Mooney and Navajo Falls. We didn’t research when the best time to photograph either of them would be, and we happened to get bright, even lighting. Since then, we’ve discovered great tools to use when planning shots.
Google Earth Pro
We love using Google Earth Pro to plan our photographs. It’s free and you can input any date into it and see where the sun will be throughout the day anywhere in the world. Check out the video below to see it in action.
PhotoPills app
When we’re looking to photograph the stars, we rely on the PhotoPills app app. It’s $6, and allows you to track the moon, planets, and Milky Way anywhere in the world. We love that it gives you a timeframe for when the night sky will be darkest. Shoot during this time for the best astrophotography.

Since our trip to Havasupai in 2018, we’ve used the PhotoPills app to plans shots like this at Mount Rainier
Camera settings
Your camera settings will depend on the conditions and your personal preferences. If you’re looking to capture silky waterfalls, you’ll need a tripod and neutral density filters mentioned above. Keep your ISO low, your aperture wide, and shutter between 0.3 and twenty seconds.
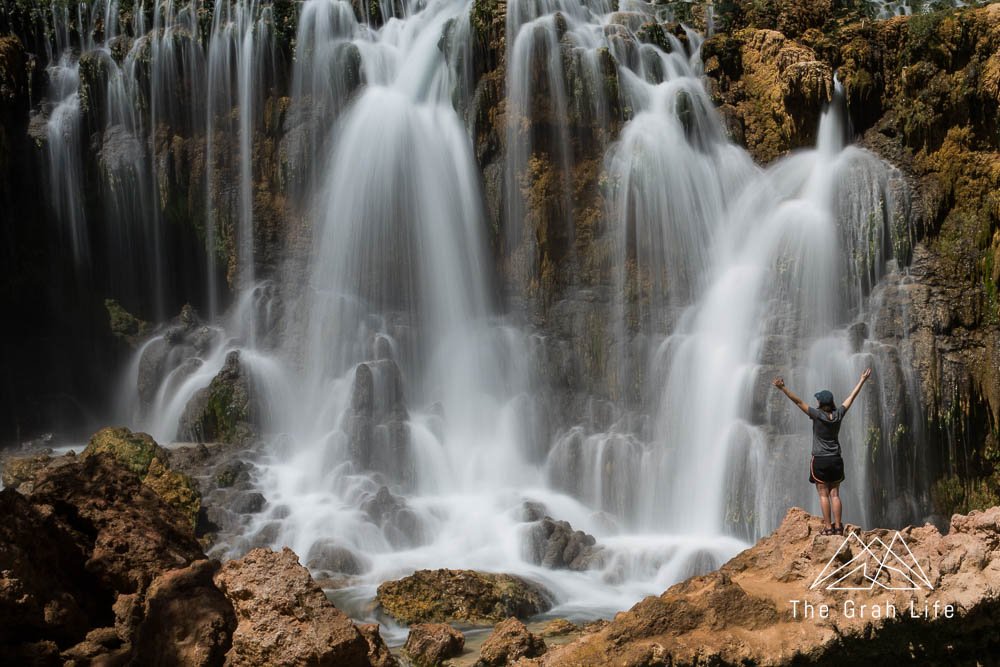
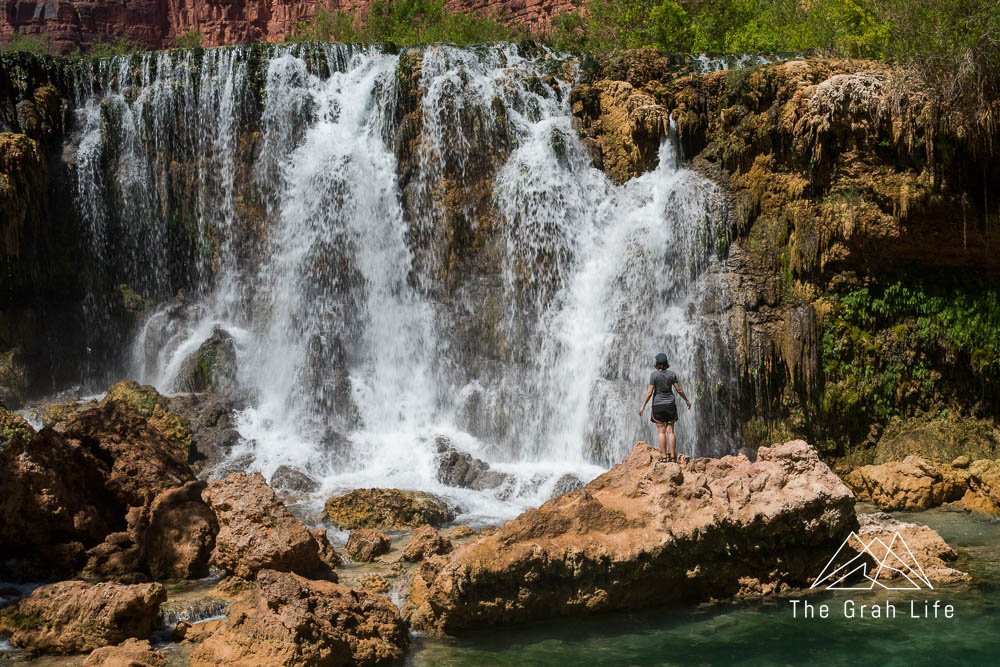
For example, this photo of Mooney Falls had a six-second exposure with neutral density filters, while this photo of Navajo Falls had a 0.6-second exposure with neutral density filters.

Six second exposure of Mooney Falls with an ND filter
0.6 second exposure of Navajo Falls with an ND filter
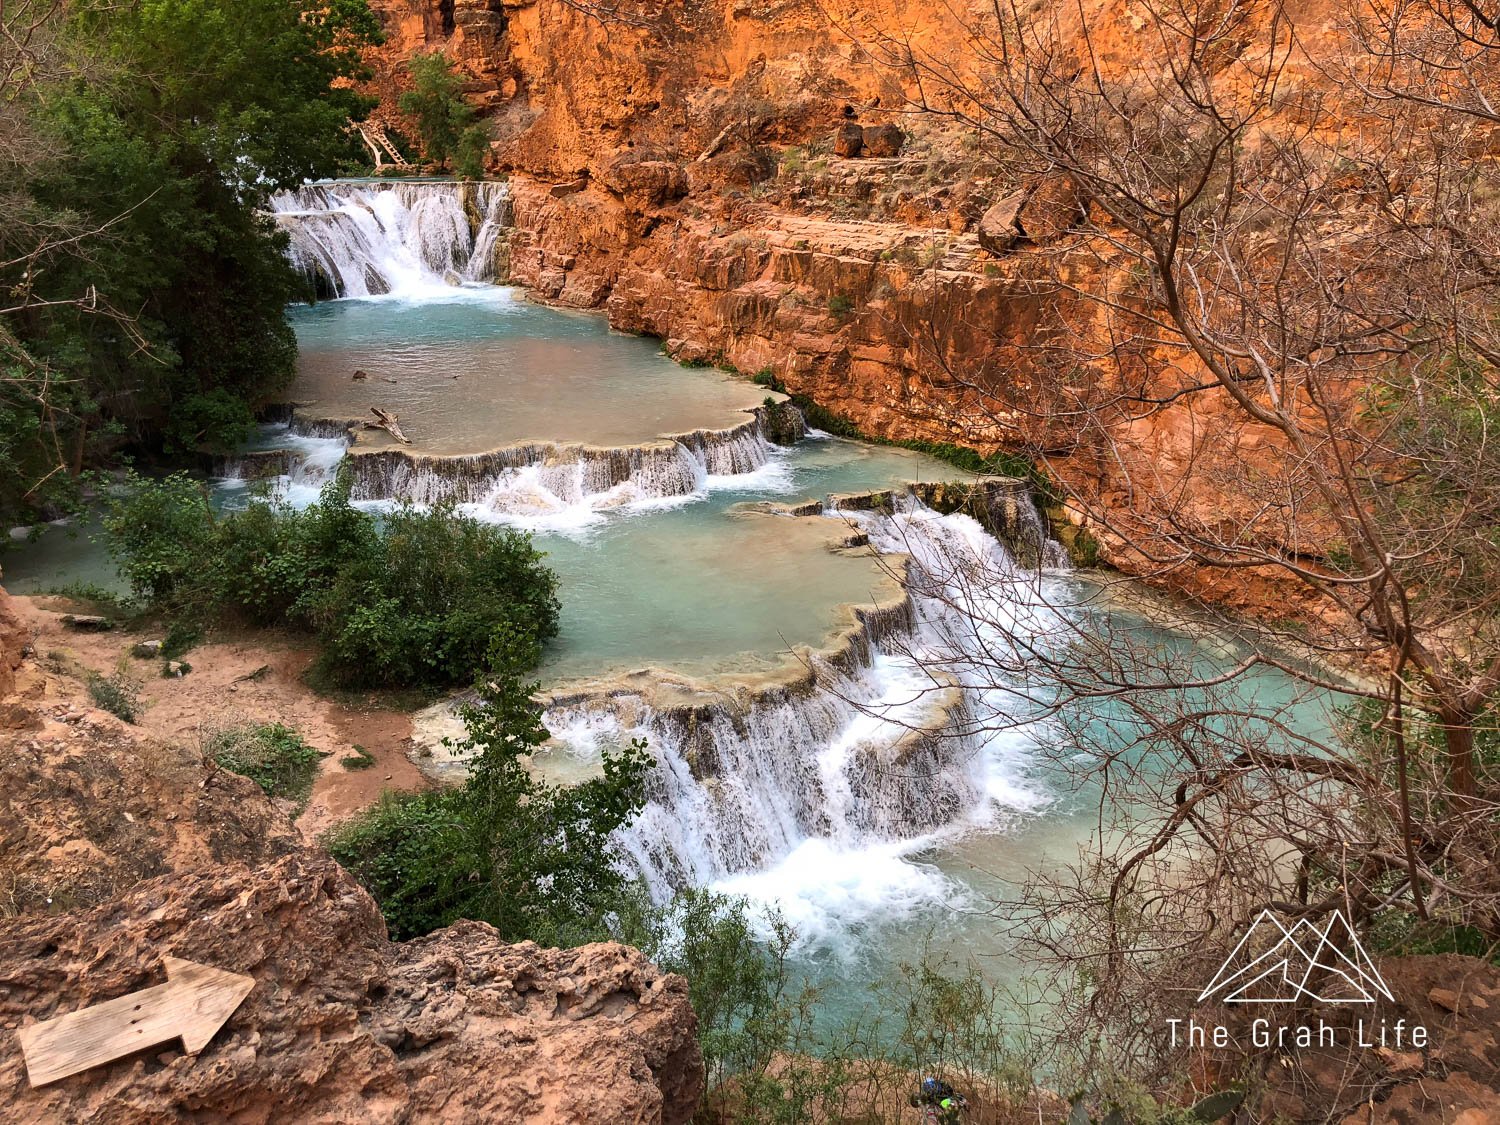
Without a neutral density filter, your photos will likely look more like this shot of Navajo Falls.
1/80 second exposure of Navajo Falls without an ND filter


Search the blog for more adventures! Try searching for topics such as “mountains”, “road trip”, or “Olympic National Park”.