Perfect Four Day Havasupai Falls Itinerary
There are a lot of moving parts to make a trip to Havasupai Falls work out. You’ll need to consider everything from flying in, traveling with, or renting gear, when to check in, to starting your hike in the middle of the night.
This blog not only walks you through the ideal itinerary for your time at Havasupai Falls but also covers what you’ll need to do upon arriving in Arizona to make your trip a success.
Day before your hike: Check in at the Grand Canyon Caverns Inn
Day 1: Hike to Havasupai Falls
Day 2: Hike to downstream waterfalls
Day 3: Explore upstream waterfalls
Day 4: Hike back to the Hualapai Trailhead
Disclosure: This post includes affiliate links with recommended lodging recommendations and hiking gear. We’ll receive a small portion of that sale if you click through and reserve lodging or purchase a product. You won’t be charged more, and we haven’t been paid by any of these retailers to share their information. These are all our genuine preferences.

How to visit responsibly
First and foremost, you’ll need to purchase a permit to visit Havasupai Falls prior to your visit. Find out everything you need to know about getting one, here. Second, know that visiting Havasupai Falls is a privilege. Treat the land and the Tribe with respect by packing out everything you pack in and following leave no trace principles.
Where to fly into
The nearest airports to Havasupai Falls are in Las Vegas (LAS) and Phoenix (PHX). From there, you’ll need a rental car to reach the check in point at the Grand Canyon Caverns Inn and the Hualapai Hilltop Trailhead.
Since the check in point is 1.5 to 2 hours from the trailhead, it’s ideal to check in the day before you start your hike.
If you plan to check in on the same day as your flight in, you’ll need to ensure that you get to the Grand Canyon Caverns Inn before they close for the day. Check-in times can vary (call ahead for updated hours) but are usually between 6 a.m. and 7 p.m.
Don’t forget to gas up along your way to the Grand Canyon Caverns Inn as well. From there, you’ll need to be able to drive 200 miles to reach the trailhead and back.

Las Vegas
From Las Vegas, it’s a two-and-a-half-hour drive to the Grand Canyon Caverns Inn. Along the way, you’ll drive part of the historic Route 66. We loved stopping at the small shops along the drive, so leave time for that on your way to or from Havasupai Falls.

Phoenix
Phoenix is three hours and half to four hours from the Grand Canyon Caverns Inn depending on your route. The last hour of the drive is also on the historic Route 66.
Where to find lodging
For the hike into Havasupai, we recommend staying on Route 66 at the Hualapai Lodge or Grand Canyon Caverns Inn to have the closest accommodations to the trailhead. After you get back from hiking, stay nearby, or head back to the city you’re flying out of.
Day before your hike: Check in at the Grand Canyon Caverns Inn
In the days leading up to your hike to Havasupai Falls, you’ll need to run a few errands.
Pick up any gear you need, couldn’t fly with, or gear rentals
Grab something to eat for breakfast the morning you start your hike
You’ll likely be starting your hike in the very early morning and won’t feel that hungry, but you’ll need to eat. Starting this hike on an empty stomach is a bad idea.
If the idea of eating in the middle of the night sounds uncomfortable, try getting a pizza the night before to have leftovers in the morning. Most everyone can eat pizza any time of day without complaint.
Check in at the Grand Canyon Caverns Inn.
Skip this step and you won’t be allowed to hike into Havasupai Falls.
It’s possible to do all these things on the day you fly in, but if you can, spread it out between a couple days to give yourself a more relaxed start to your trip.
Don’t forget to go to bed early the night before your hike. The Tribe says to expect driving on Indian Road 18 to take 1.5 to 2 hours, so you could be waking up at 2 a.m. or earlier.
On nights with early starts like this, we try to go to bed between 7 p.m. and 9 p.m. Sleep aids, such as melatonin and sleep masks, really help. Try to stay on this early-to-bed, early-to-rise routine for your whole trip to help avoid hiking in the heat.

Our view hiking into the Grand Canyon before sunrise
Day 1: Hike to Havasupai Falls
You’ll get to the trailhead while it’s still dark and begin your descent into the Grand Canyon by headlamp. By the time you’re at the bottom of the canyon, the sun will be splashing golden light onto the canyon walls.
For some of you, like Zach, this will be your first glimpse of the Grand Canyon. What a unique way to experience it!
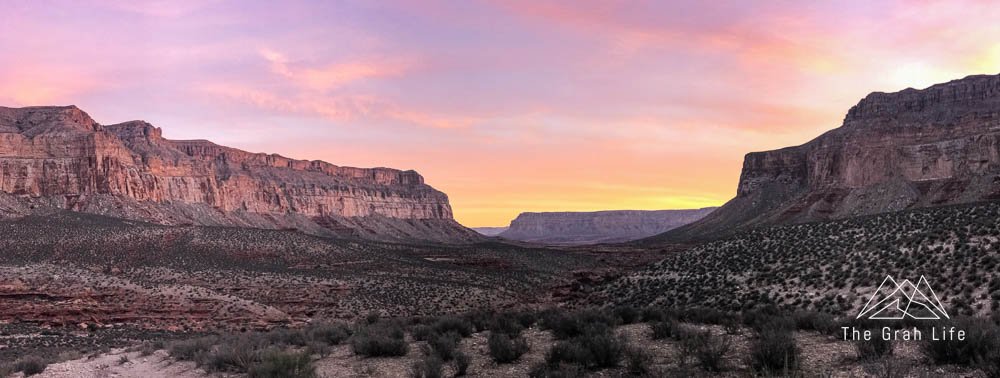
The sunrise a couple hours into our hike
Your start time will depend on the time of year you hike. In the hotter months, you’ll want to start your hike early enough so that you’re in the canyon by the time the sun is rising to avoid as much heat as possible. The entire hike is exposed, so this is very important.
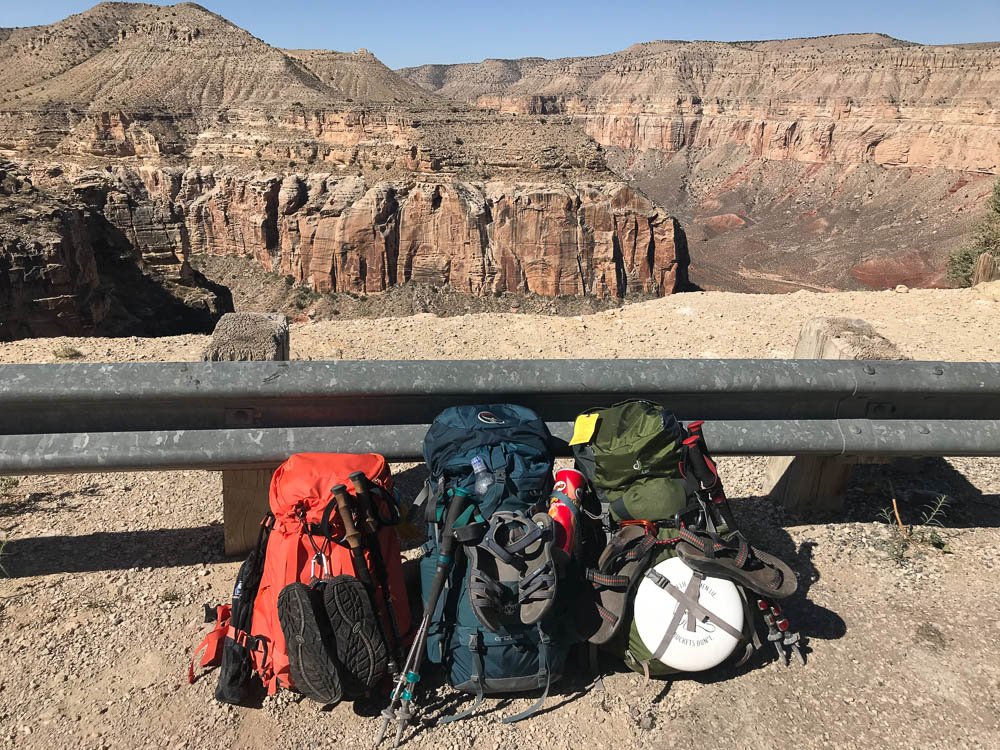
Overall, you can expect the hike to Supai Village to take four to six hours. Remember to bring snacks like these and at least 3.5 liters of water per person in addition to salt pills, or Nuun to replace the electrolytes and salt you’ll be sweating out.

Day 2: Hike to downstream waterfalls
Since the hike out is harder than the hike in, we think it’s best to do the most exploring the day after you arrive at Havasupai Falls. If you haven’t read about each waterfall at Havasupai Falls, check out this blog for that.
If you’d rather not adventure downstream to Mooney Falls, it’s totally understandable. Instead, relax at Havasu Falls near the campground or the waterfalls upstream. There are plenty of spots to swim!

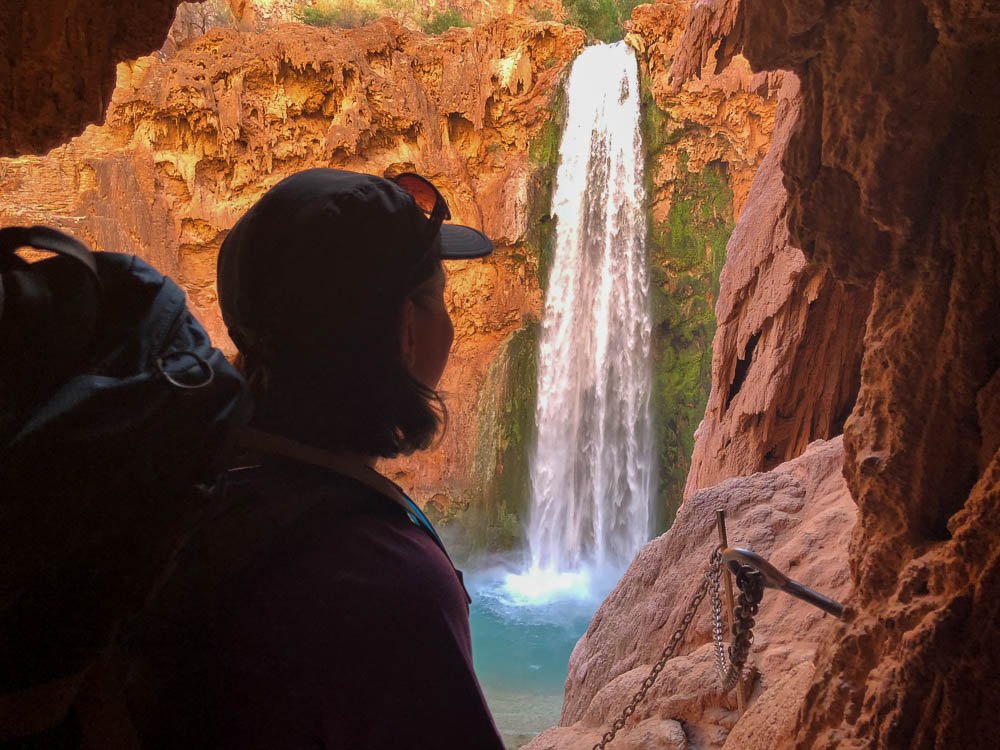
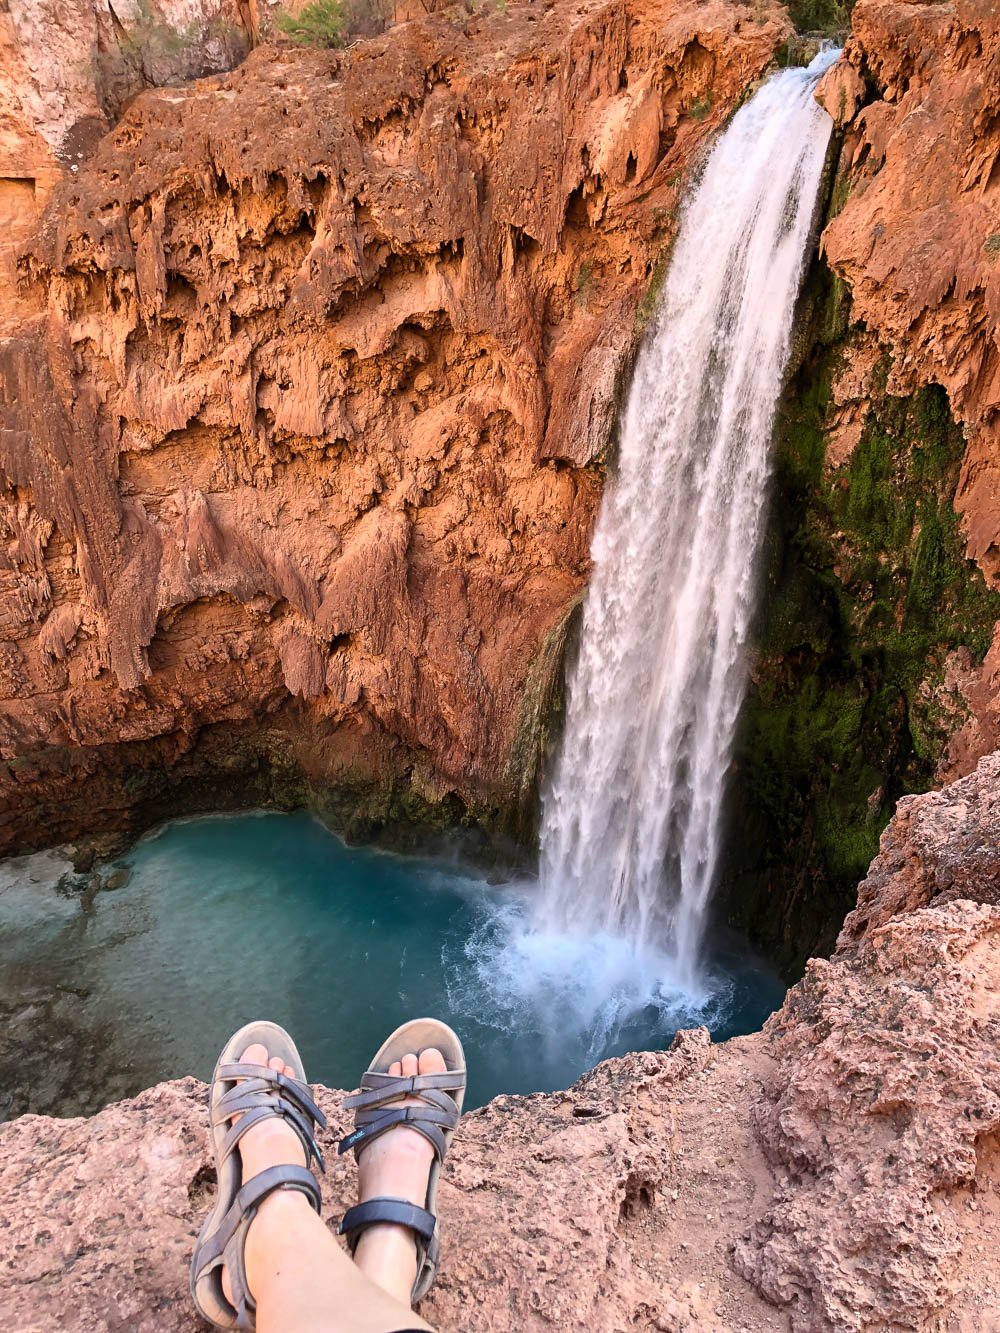
Mooney Falls
You’ll want to start hiking to Mooney Falls at sunrise. You’ll need daylight to climb down to it, but if you’re hiking beyond that, it’s all exposed and you’ll greatly benefit from an early start. You can swim here, but if you’re headed to Beaver Falls or the Confluence, keep going.

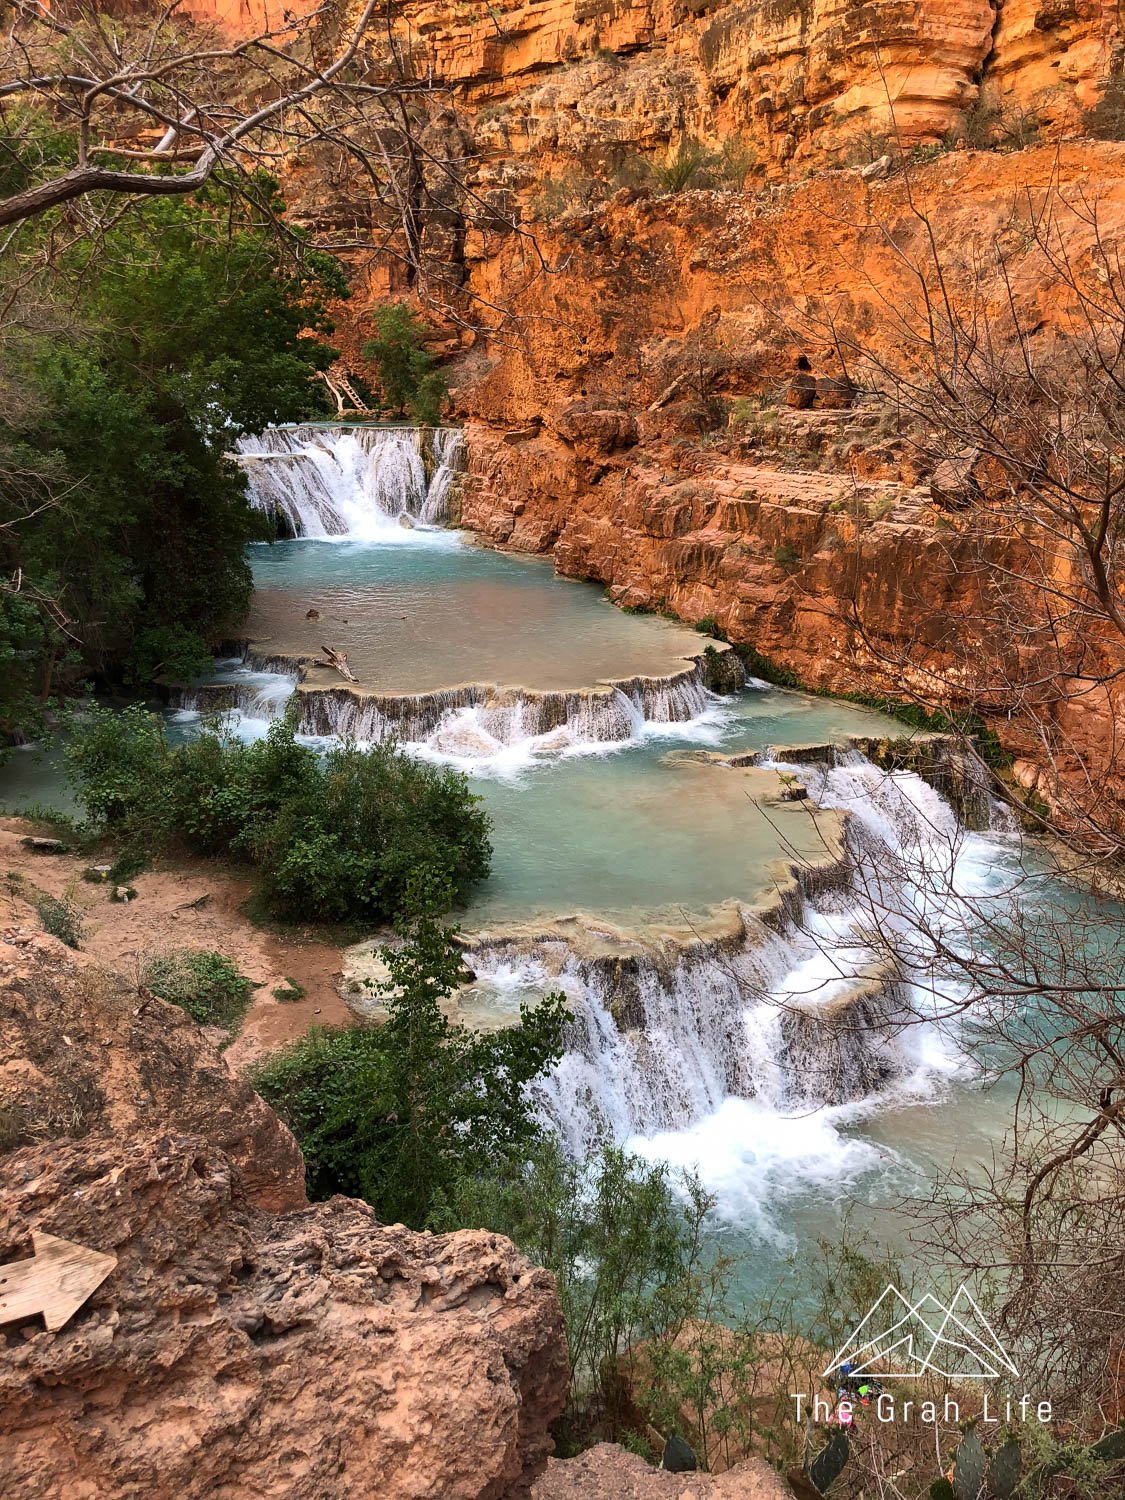
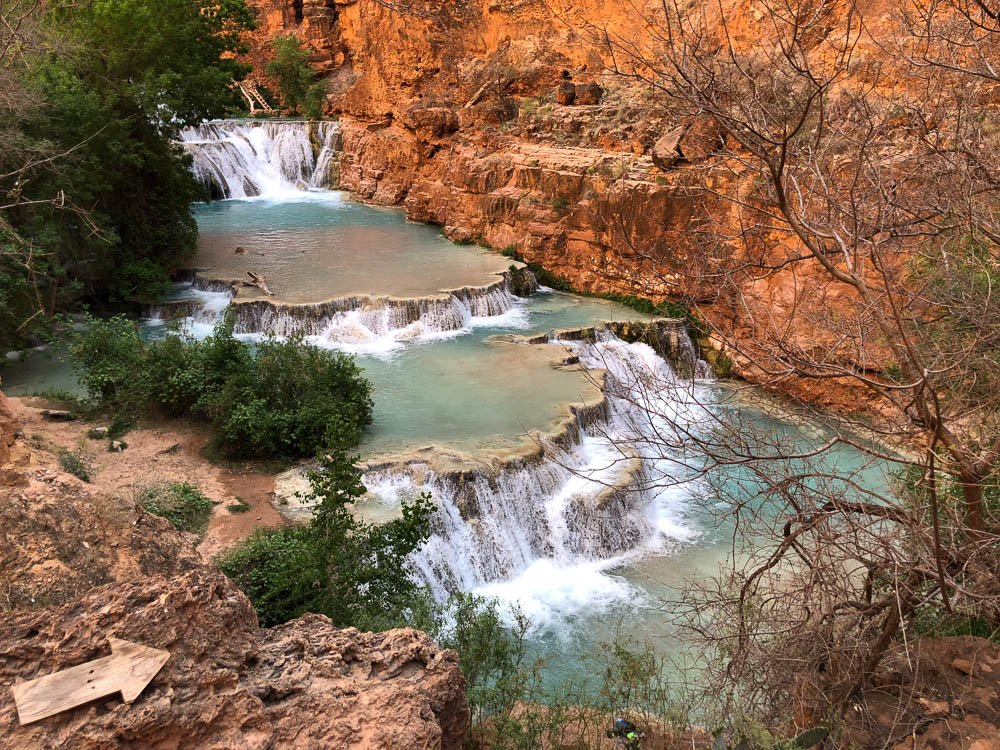
Beaver Falls
The hike to Beaver Falls is six miles roundtrip from the campground. If you’ll be hiking from the lodge, add four more miles to that total. It’s a beautiful trail, with lots of river crossings and a few ladders.

Wear Chacos with neoprene booties or water shoes for this hike. Don’t forget your daypack with your ten essentials, water, and snacks as well. You’ll want to bring a minimum of 2.5 liters of water per person since filtering water from Havasu Creek isn’t good for your filter.

Stop here for the best swimming at Havasupai Falls. The tiered waterfalls make great places to sit, while there are some not-too-deep areas to swim as well. We happily spent an entire afternoon here!
The Confluence
If you continue hiking past Beaver Falls another ten miles (16 miles round trip from the campground), you’ll reach the Confluence. This is where the muddy Colorado River and turquoise Havasu Creek merge together beautifully.
There is no trail to the confluence, so only attempt it if you’re familiar with route finding and have a GPS map. Back in 2018, this was out of our comfort zone and skill range, so we opted not to hike past Beaver Falls.
Day 3: Explore upstream waterfalls
There is so much to see near the campground and village, too. Explore nearby waterfalls on your third day at Havasupai Falls to rest your legs for the big hike out the following day.
Havasu Falls
Havasu Falls is the falls nearest the entrance of the campground. If you’re staying at the lodge, it’s worth checking out on your way to the downstream waterfalls on day two, but it is the most crowded of them all.

Navajo Falls
Navajo Falls is the halfway point between the campground and the lodge. You’ll find swimming holes above the falls, and it’s much less crowded than all the other waterfalls (sans Fifty Foot Falls).

Fifty Foot Falls
You’ll find Fifty Foot Falls above Navajo Falls. There is no trail to them, so they’re easy to miss. Depending on how the tule weed has grown near the river, accessing a spot to view the falls could be impossible.
We were happy with the views below and opted not to bushwack to see Fifty Foot Falls.

Visit Supai Village
If you haven’t already spent time in Supai Village, this is your day to do it. Stop by the Cafe if they’re open (hours vary) and mail yourself a postcard at the post office. It’s the only place in the world where you’ll get a “mailed by mule” stamp!

Prep your gear
You’ll need to pack up what gear you can and prepare for an early start tomorrow. Turn in for an early night!
Day 4: Hike back to the Hualapai Trailhead
Your last day at Havasupai will be another early one. If you’re planning on helicoptering out (more on that here), the line starts forming at 4 a.m.; otherwise, you’ll likely be starting your hike around then.
Hike out
It’s crucial to be finished with the hike by the time the sun hits the canyon wall at the end of the hike. Hiking up the canyon in the sun would make for a terrible experience.
What time you’ll need to start depends on the time of year and your pace. Remember that the hike out is harder than the hike in — you’ll be hiking uphill the entire way back to the trailhead. On average, it takes between five and seven hours.

Hualapai Trailhead
Once you reach the trailhead, you’ll see this portion of the Grand Canyon from above in the daylight for the first time. Take our advice and leave a stash of these goods in your car for your return.


Search the blog for more adventures! Try searching for topics such as “mountains”, “road trip”, or “North Cascades National Park”.